Hello Copic fans,
Hallo Copic-Fans!
It's me again, Barbara/Kreativmonster
for the Copic Marker Europe Blog Challenge.
***
Ich bin's wieder, Barbara/Kreativmonster,
mit der Copic Marker Europe Blog Challenge.
And now, here comes the winner of Challenge 10, it is....
***
Jetzt kommt endlich die Gewinnerin der Challenge 10, es ist...
#3 MERKKARI

Merkkari, please send us an email with your request for 3 Copic Sketch markers.
***
Merkkari, nimm bitte per E-Mail Kontakt mit uns auf und nenne uns deine 3 gewünschten Copic Sketch Marker.
*************************************************************************
Here is our new challenge for you:
***
Hier ist unsere neue Challenge für euch:
***
Hier ist unsere neue Challenge für euch:
Something for Christmas, but no card
Etwas für Weihnachten, aber keine Karte
Etwas für Weihnachten, aber keine Karte
Here are some inspirational projects from our Designteam and a tutorial about Copics on candles:
Hier sind einige inspirierende Werke des Design-Teams und ein Tutorial über Copics und Kerzen :


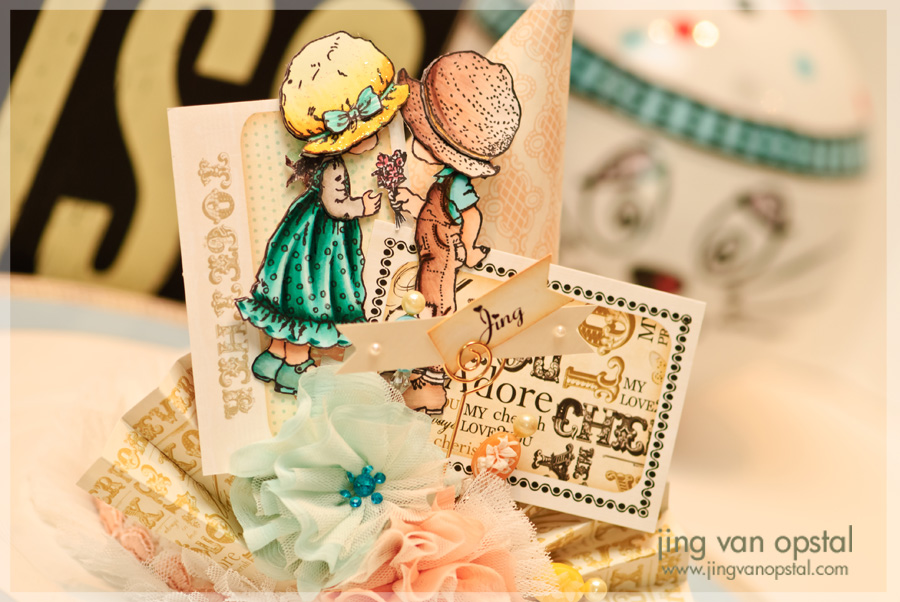
 Layout:

Stretcherframe/Keilrahmen
 Tomorrow, Diny will show here beautiful Christmas ornaments she made using a Creatable from Marianne Design, don't miss it!
***
Morgen wird Diny hier wunderschöne Weihnachtsornamente zeigen, die sie mit einer Creatable von Marianne Design gemacht hat, verpasst das nicht!
Hier sind einige inspirierende Werke des Design-Teams und ein Tutorial über Copics und Kerzen :


Stretcherframe/Keilrahmen

***
Morgen wird Diny hier wunderschöne Weihnachtsornamente zeigen, die sie mit einer Creatable von Marianne Design gemacht hat, verpasst das nicht!
So now, it's your turn! Show us your work, and
you can win 3 sketch markers of your choice. As usual, we want you to use your Copics for your project.
Of course, we are happy about participants from all over the world, but we can only send Markers to winners who are living in Europe, North Africa and the Middle East.
Enter your link in Mr Linky
before the end of 25h November
***
***
Also, jetzt seid ihr dran! Zeigt uns Eure Werke,
Ihr könnt 3 Sketch Marker Eurer Wahl gewinnen. Wie immer möchten wir natürlich, dass ihr eure Copics für euer Projekt verwendet.
Ihr könnt 3 Sketch Marker Eurer Wahl gewinnen. Wie immer möchten wir natürlich, dass ihr eure Copics für euer Projekt verwendet.
Natürlich freuen wir uns über Teilnehmer aus der ganzen Welt, aber wir können die Marker nur an Gewinner schicken, die in Europa, Nordafrika und dem Mittleren Osten leben.
Tragt Euren Link in Mr. Linky ein
Teilnahmeschluss ist der 25. November.
Tragt Euren Link in Mr. Linky ein
Teilnahmeschluss ist der 25. November.
To enter visit our Challenge page
Auf unserer Challenge Page könnt ihr euch eintragen.
We are looking forward to see your creations!
Wir freuen uns darauf, eure Werke zu sehen!
Hugs
Barbara/Kreativmonster
for
CME team
++++++++++++++++++++++++++++++++++++++++++
CME team
++++++++++++++++++++++++++++++++++++++++++


.jpg)